|
 
Installing your FoamTrim accents are easy and fast.
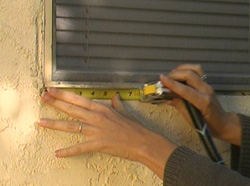
The measuring instructions
page
describes in detail how to fit the trim sizes to the desired openings.
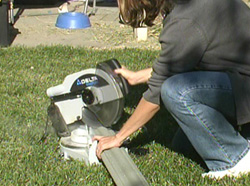
Cut: Using a standard wood saw or power saw, cut
through the outer exterior finish of your trim to the
desired lengths. Miter (diagonal) cut the corners.
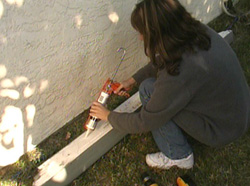
Glue:
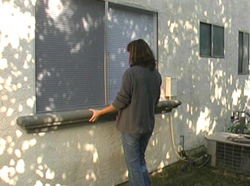
Glue your trims to the wall using a low
solvent
exterior construction adhesive. We recommend a generous S-curved
bead of clear 100% silicone. In some instances, pieces of double stick foam tape will hold the trim to
the wall while the adhesive cures. You may also temporarily use strips of
masking tape across the outside surface of the trim to hold in place until
the adhesive dries. On heavier installations, even a nail or screw
can be driven into the wall first with the accents attached to keep it in place.
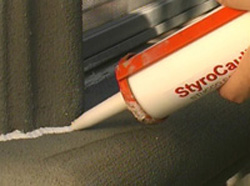
Caulk:
Before painting, fill any seams or gaps with stucco patch or our exclusive
"StyroCaulk", stucco
caulking. You won't have to caulk again, because FoamTrim accents will not warp
or leave a gap like wood can. Your new home accents are maintenance-free.
Paint: You are now ready to paint the accents with the color or
finish of your choice.
Cutting Window Sill Returns
If you purchased stock sills with finished end returns, please disregard these instructions.
If you purchase 8' accent sills, please follow these instructions to achieve a finished return to your wall
on each side of the window.
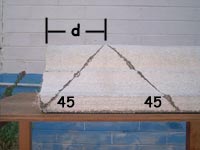
The cuts you make on both ends of your sill for these returns are
why you must add extra lengths to your sill measurements. Lay sill
flat-side down. At one end of your sill, measure the return
depth of the flat side of the sill stick and mark it on the sill
face (d). At this point, you will need to cut two miters (an
"upside down" V ) in the sill with the point of the V at the place
you marked. Each cut must be 45 degrees as shown. By
doing this, you will cut two pieces from the sill.
|
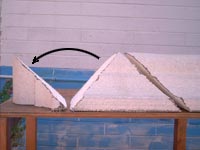
The middle piece that's a full
triangle and mostly all foam will be discarded and the one that remains
(with the most finished surface) becomes the return. Flip end piece which, will be used as the return. Repeat procedure for return on other side of sill. |
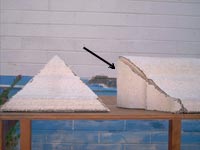
Slide the end piece over to the wedge cut in the
sill and assemble using glue, such as 100% clear silicone.
Repeat on the opposite side of the sill. Create both returns on the sill first before
gluing sill to the wall. You may even use toothpicks or nails to hold the
end pieces to the sill while the glue dries.
Seams must be "StyroCaulk" filled.
|
Optional Pre-finished Ends
FoamTrim window sills may also be ordered with finished ends so the
above procedure will be unnecessary. Order your sills
with finished ends by giving us the sill length (in inches)
you need.
|
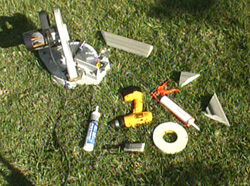
All the tools you'll need
(Power saw optional)
Just Measure
Cut
Apply glue (adhesive)
Adhere to the wall
Caulk the seams
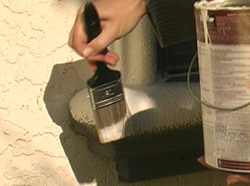
Paint
|